Install Torque Agent
Torque Control plane offers centralized orchestration and management for Kubernetes orchestration tools such as Kubernetes manifest, Helm and Crossplane. In this guide, we will go over some of Torque basic features allowing quick onboarding of Kubernetes automation assets into the platform, standardization of Kubernetes orchestration using blueprints and securing deployment process using tagging, policies and RBAC.
In this quick-start guide, we will cover the following topics:
- Create a new Torque Space
- Onboard a GitHub repository and discover the automation assets in it
- Generate your first blueprint and modify it to include deployment credentials
- Launch a blueprint and get access to the deployed resource in the newly created environment
NOTE: This guide will focus on Kubernetes manifest and Helm orchestration, click here for more information about Torque supported platform.
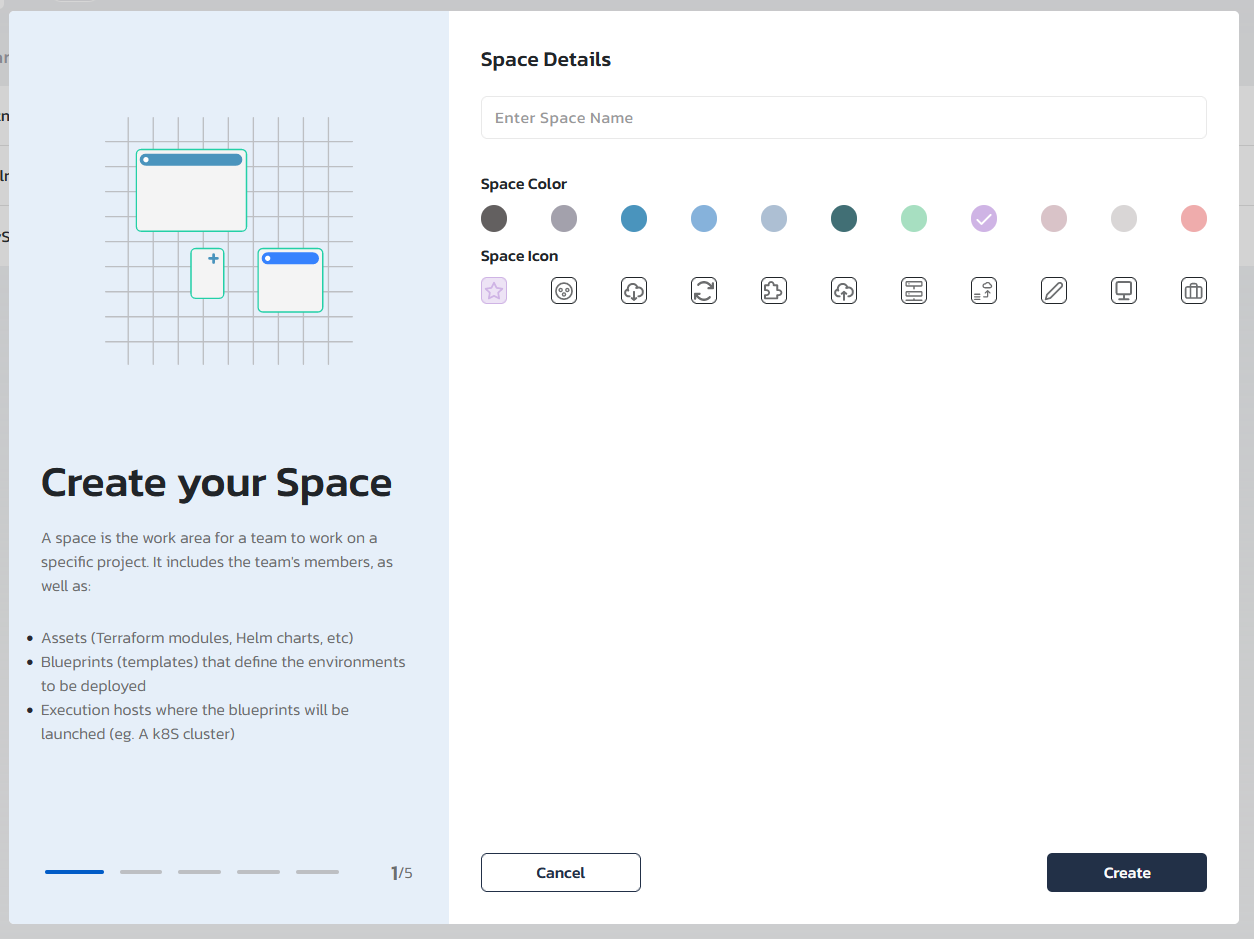
Step #1: Create a space
Spaces are logically separate area that contains an association to one or more agents, asset and blueprint repositories and set of permitted users. Spaces can be used to logically separate between teams, projects, or even development lifecycle stages and allow the relevant end-users, administrators and blueprint designers to access only the relevant blueprints and environments.
-
To create a new space, use one of the following methods:
- Navigate to the "Administration" section and open the "Spaces" tab. This is the account space management section where you will be able to create, edit and delete spaces.
- In the spaces dropdown, located in the left side-menu, click on "Create new space"
-
Set the space name, image and color. Space name, image and color can always be changes in the "Administration" are under the "Spaces" tab
Step #2: Connect a repository
Now, that you have a new space configured, we will associate a repository to the space and generate blueprints using the automation-assets that will be discovered by Torque in that repository. We recommend using your-own repository hosted in one of the supported Git Providers. For using on-prem/hosted versions of one of the supported (Version Control System) providers, see Repository Setup.
-
In the repository onboarding wizard, choose your VCS provider, provide the repository URL and click "Connect". Torque will open a new windows where you will be requested to authenticate to the VSC provider. VCS providers work differently, but usually, a token will be generated for your user and Torque will use that for any communication with that VCS.
-
Click "Discover Assets" to initiate the Torque asset discovery process that will go over the repository and highlight the automation assets Torque discovered.
-
To generate a blueprint from one of the discovered assets, check the blueprint in the list and click on "Generate Blueprints"
-
Click on "Connect an Agent"
Step #3: Install an Agent
In this step, we will configure a Torque agent that will execute, manage and monitor the Kubernetes workload we discovered and plan to deploy.
For Kubernetes workloads, Torque requires a self-hosted agent to be installed in the target cluster where the workload will be deployed or use Torque capability to orchestrate on remote clusters. The Quali Hosted Agent presented in the [Getting started with Terraform](/getting-started/Getting starting with terraform.md) article, is suitable only for Terraform workloads.
-
In the "Connect an agent" dialog, select the "Install new self hosted agent" and click "Next". Now, you are required to choose one of the supported cloud providers managed Kubernetes service or a self-managed Kubernetes cluster. Choose one of the options, In this example, we will use AWS EKS.
-
Provide a new for the agent, and click "Next"
-
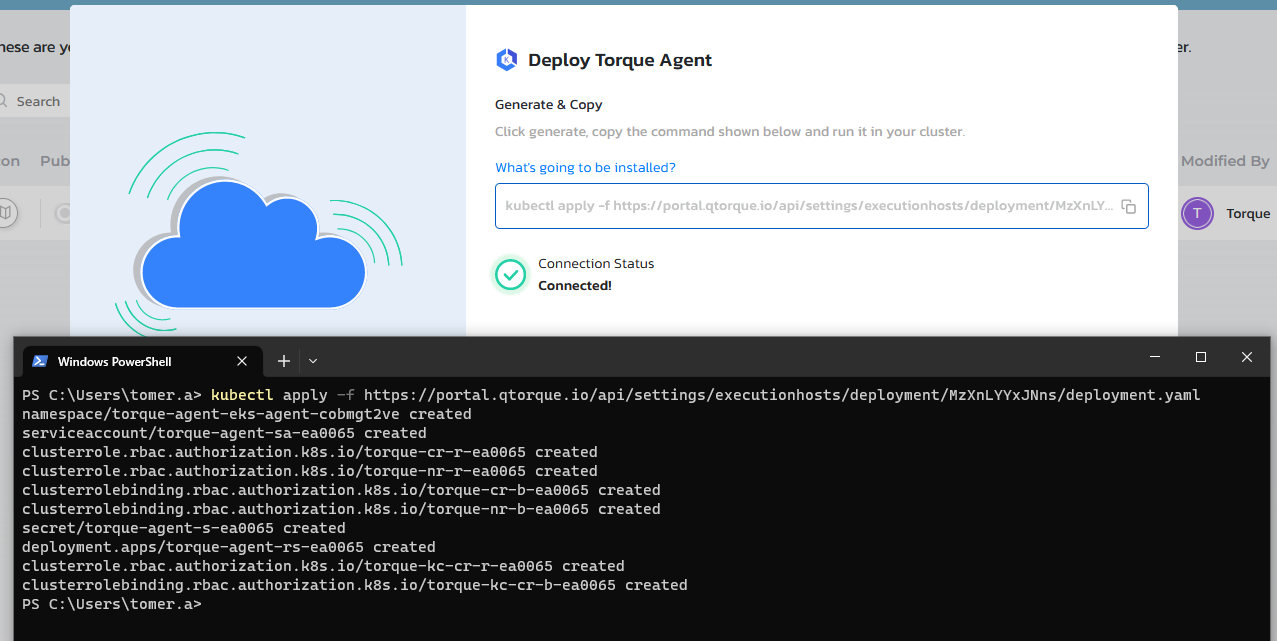
Click on "Generate", this will generate a CLI command based on
kubectlthat you can now execute on the Kubernetes cluster. Here is an example output of the command.
Note that the command creates a new namespaces, and deploys the Torque agent in it. It might take up to 2 minutes for the Agent to get up and running, so want for the Torque self-service indication to make sure the agent is connected.
In case the agent is not connected to Torque after 2 minutes, we recommend checking the pod statuses using the following command looking for the Torque agent pods and further debug kubectl get pod --all-namespaces. In some cases, Kubernetes clusters are pre-configured with proxies, private registries and limited outbound connectivity - in those cases, contact Quali Support and we will make sure to assist you with the installation.
- Now, it's associate our newly connected agent with our space. Click the "Associate to space".
- The space is already selected for you, but, you still need to set the default namespace and service-account that will be used by Torque to deploy workloads into the cluster. It's always possible to change the default values in the "Administration" section under the "Agents" section.
Step #4: Launch an Environment
🚀🚀 Congrats! you are finally now ready to launch your first environment! 🚀🚀
- To expose the new blueprint into the Space catalog, navigate into the Blueprints page and toggle the Publish option.
- Navigate to the Catalog and click the Launch button on the blueprint card.
- Specify the environment's name, duration, tags and inputs - note that some of the inputs may be the authentication information required for AWS or Azure as describes in step #3.
- Optionally assign collaborators to the environment. While everyone in the space has "read" permission to its environments, only the environment's owner and collaborators can perform actions that change the environment: extend end the environment, reconcile or update resource changes, etc. When launching the environment, the new owner/collaborators will receive a notification email if you have Notifications configured in the space.
- Finally, click Launch.
- Wait until the environment is active and use as needed. URLs to the environment's applications are typically provided as outputs - these can be found in the environment's Quicklinks on the right pane.
- Check out the Resources pane to get details about your environment's resources. Use this tab to understand what assets each grain spun up, get connection details to specific resources, and more.